Prepare host OS
To start using Live Transcoder, there are few more steps to do, such as login to the Comprimato DockerHub and downloading the docker-compose file. Once you are finished with those, you can start Live Transcoder and save the image of your VM instance for future use.
Before connecting to the VM, please wait a few minutes for the automated script to finish installing and configuring everything.
SSH to the host OS
The easiest way to SSH to the host OS is to use a designated SSH web console by Google Cloud.
You can find it by navigating from the Google Cloud dashboard to Compute Engine and then to VM instances.

Use docker command without sudo
docker command without sudoAllow running all docker commands as a non-root user by:
sudo groupadd docker
sudo usermod -aG docker $USER
newgrp docker
Enable coredumps
Enabling coredumps on your host instance helps us perform full diagnostics when an issue occurs.
Using NDI Discovery server
If you plan to utilize NDI Discovery server, you must disable or remove mDNS feature from your host instance first.
High bitrate streaming
To be able to stream high bitrate codecs flawlessly, you need to adjust UDP kernel buffer size of your host instance first.
Configure cgroup settings
Edit the Configuration File /etc/docker/daemon.json and add or modify the cgroup-related settings
{
  "default-cgroupns-mode": "host"
}
If your daemon.json file already contains the runtimes configuration for NVIDIA, you can simply add additional configuration for cgroup settings without overwriting the existing content
{
    "runtimes": {
        "nvidia": {
            "args": [],
            "path": "nvidia-container-runtime"
        }
    },
    "default-cgroupns-mode": "host"
}
Save the file and restart the Docker daemon to apply the changes
sudo systemctl restart docker
All Done!Your instance is fully prepared to run Live Transcoder in docker.
Save the VM image for futureIf you plan to spawn more instances or you'd like to avoid setting instances up again for any other reason, you can save the VM instance's image with Live Transcoder as a part of it.
If you'd like to save the environment with Live Transcoder, first, continue to Run Live Transcoder in docker section and then return here and proceed with the guide below.
Save the machine image
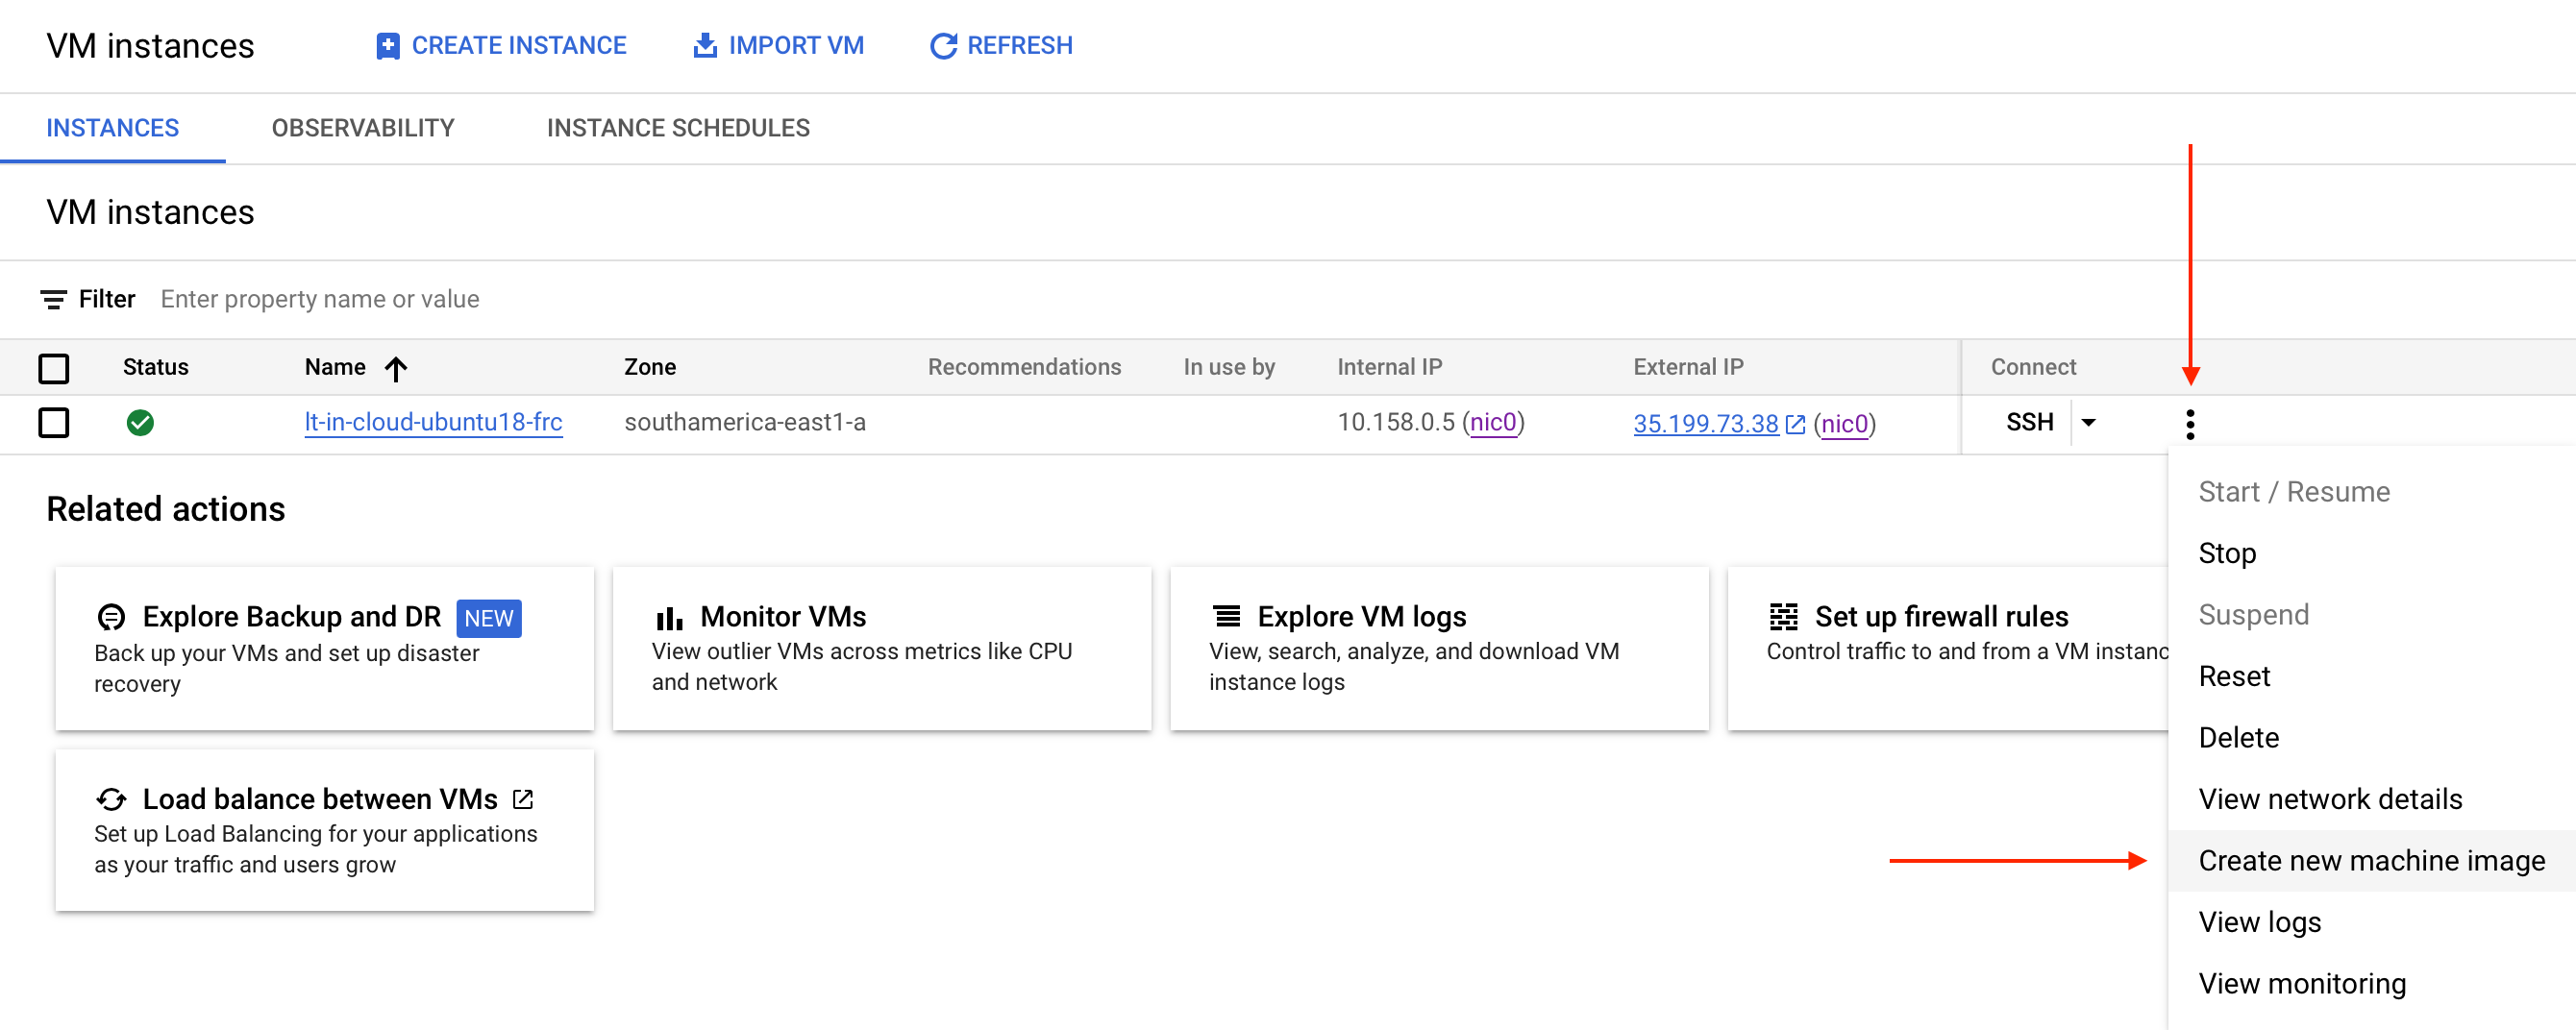
From the Google Cloud dashboard, navigate to Compute Engine and then to VM instances.
Select the three-dots menu on the left side of the VM instance and click on Create new machine image.
On the configuration page:
- Specify Name of your machine image
- Select whether the image should be bound to a particular Location
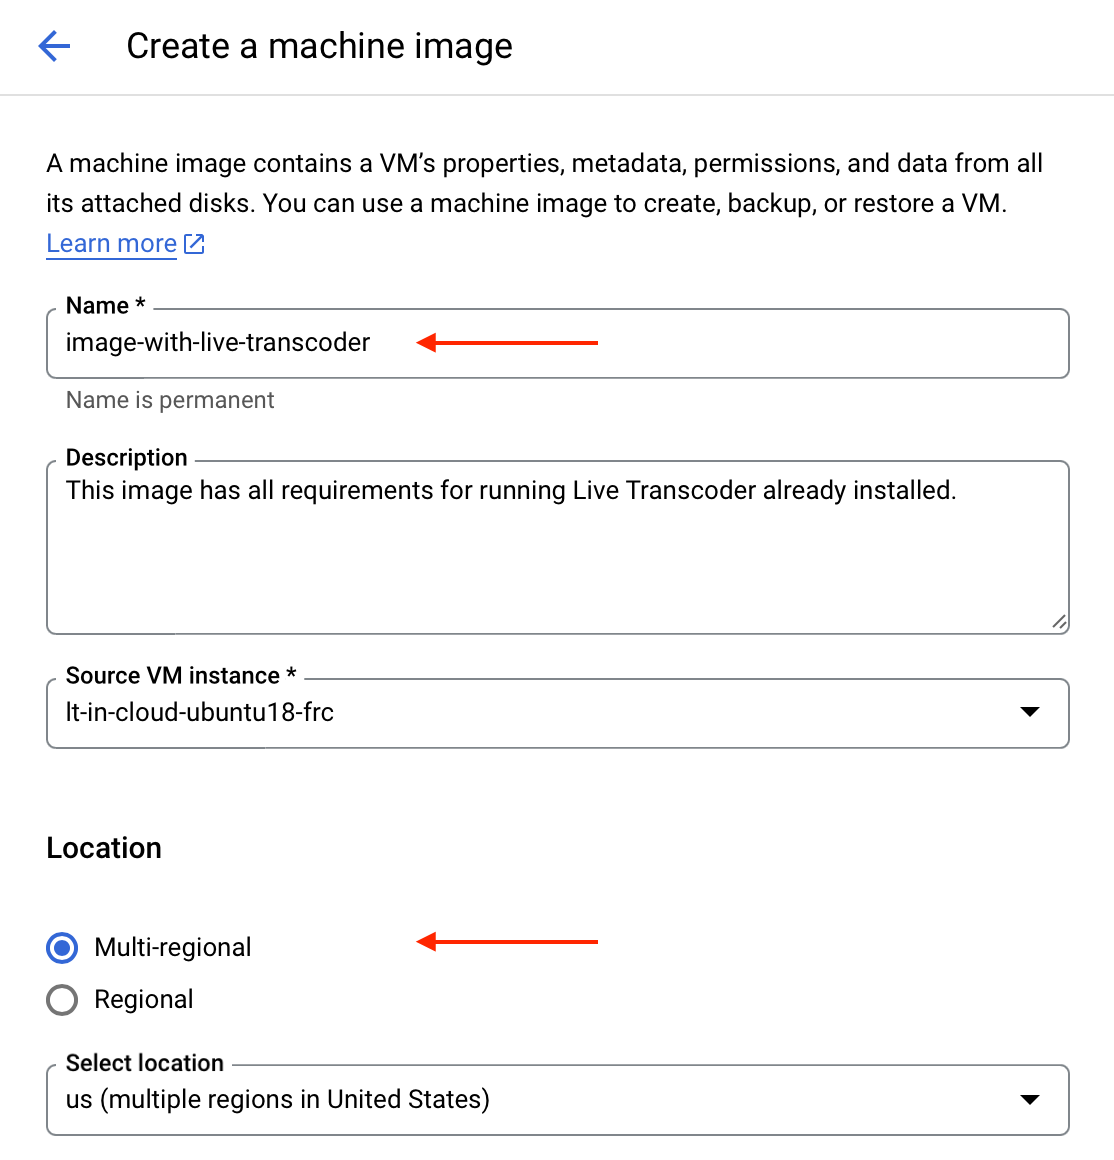
And finally, hit the Create button.
Creating an instance using a machine image
From the Google Cloud dashboard, navigate to Compute Engine and then to VM instances.
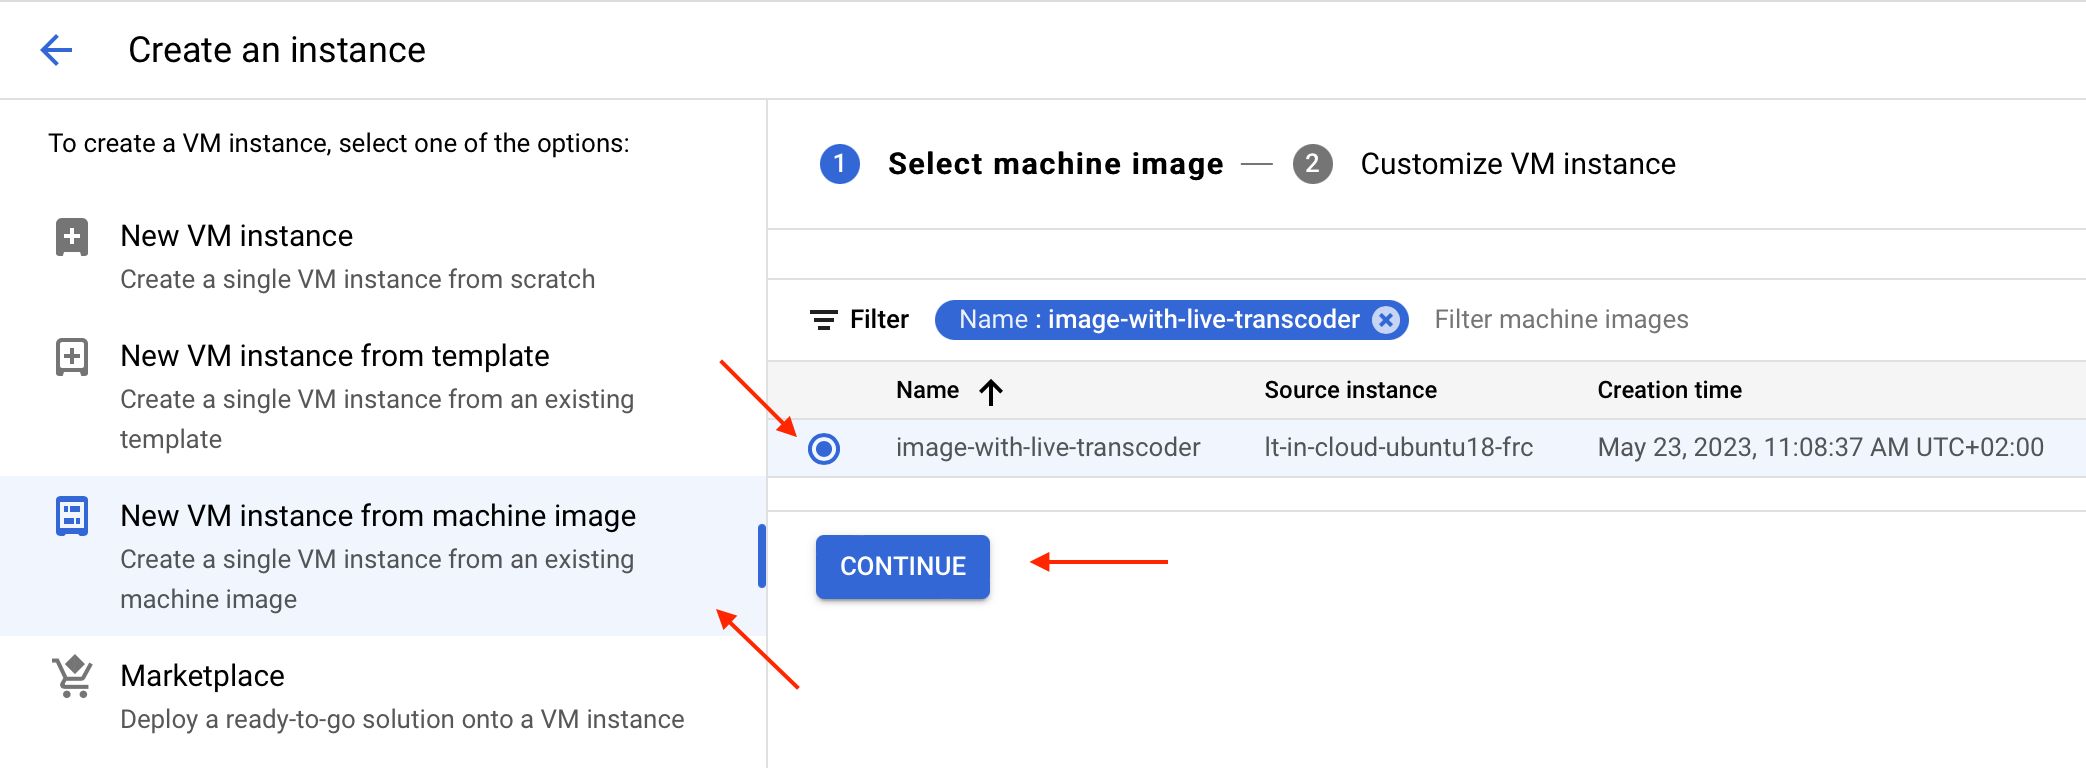
Click on Create instance button located at the top of the page.
Select the New VM instance from machine image option from the left panel.
Select the desired image and click on Continue.
On the configuration page, you should:
- Specify a Name for your new instance
- Check the selected Region
- And make sure the instance type is switched to GPUs in Machine configuration section
All other parameters match those you used in the past when creating the VM the image is based on.
Proceed by hitting the Create button.
Increase max UDP kernel buffer size
Live Transcoder requires an increase to the UDP kernel buffer size:
SYSCTL_CONF="/etc/sysctl.d/10-udp-buffer-size.conf"
sudo sh -c "echo '#kernel send a receive windows buffer sizes' > $SYSCTL_CONF"
sudo sh -c "echo 'net.core.rmem_max=262144000' >> $SYSCTL_CONF"
sudo sh -c "echo 'net.core.wmem_max=262144000' >> $SYSCTL_CONF"
sudo sh -c "echo 'net.core.rmem_default=262144000' >> $SYSCTL_CONF"
sudo sh -c "echo 'net.core.wmem_default=262144000' >> $SYSCTL_CONF"
sudo sh -c "echo '' >> $SYSCTL_CONF"
Now load the updated config file:
sudo sysctl -p $SYSCTL_CONFIncrease txqueuelen for network interfaces
To stream out high-bitrate codecs (e.g., JPEG2000 or JPEG-XS), alsotxqueuelen parameter should be increased for the respective network interface(s). Below, we set the parameter for all available Ethernet network interfaces (by using KERNEL=="e*"):
sudo bash -c 'cat > /etc/udev/rules.d/80-txqueuelen.rules' << EOF
SUBSYSTEM=="net", ACTION=="add|change", KERNEL=="e*", ATTR{tx_queue_len}="10000"
EOF
To apply the changes immediately, run:
sudo udevadm control --reload-rules && sudo udevadm triggerUpdated 11 months ago
What’s Next
With the instance up and running, you are good to proceed to the next step - Running a docker container with Live Transcoder in it.