Prerequisites
Please make sure that you meet all the following requirements for using Compute Engine in Google Cloud before continuing to the next page.
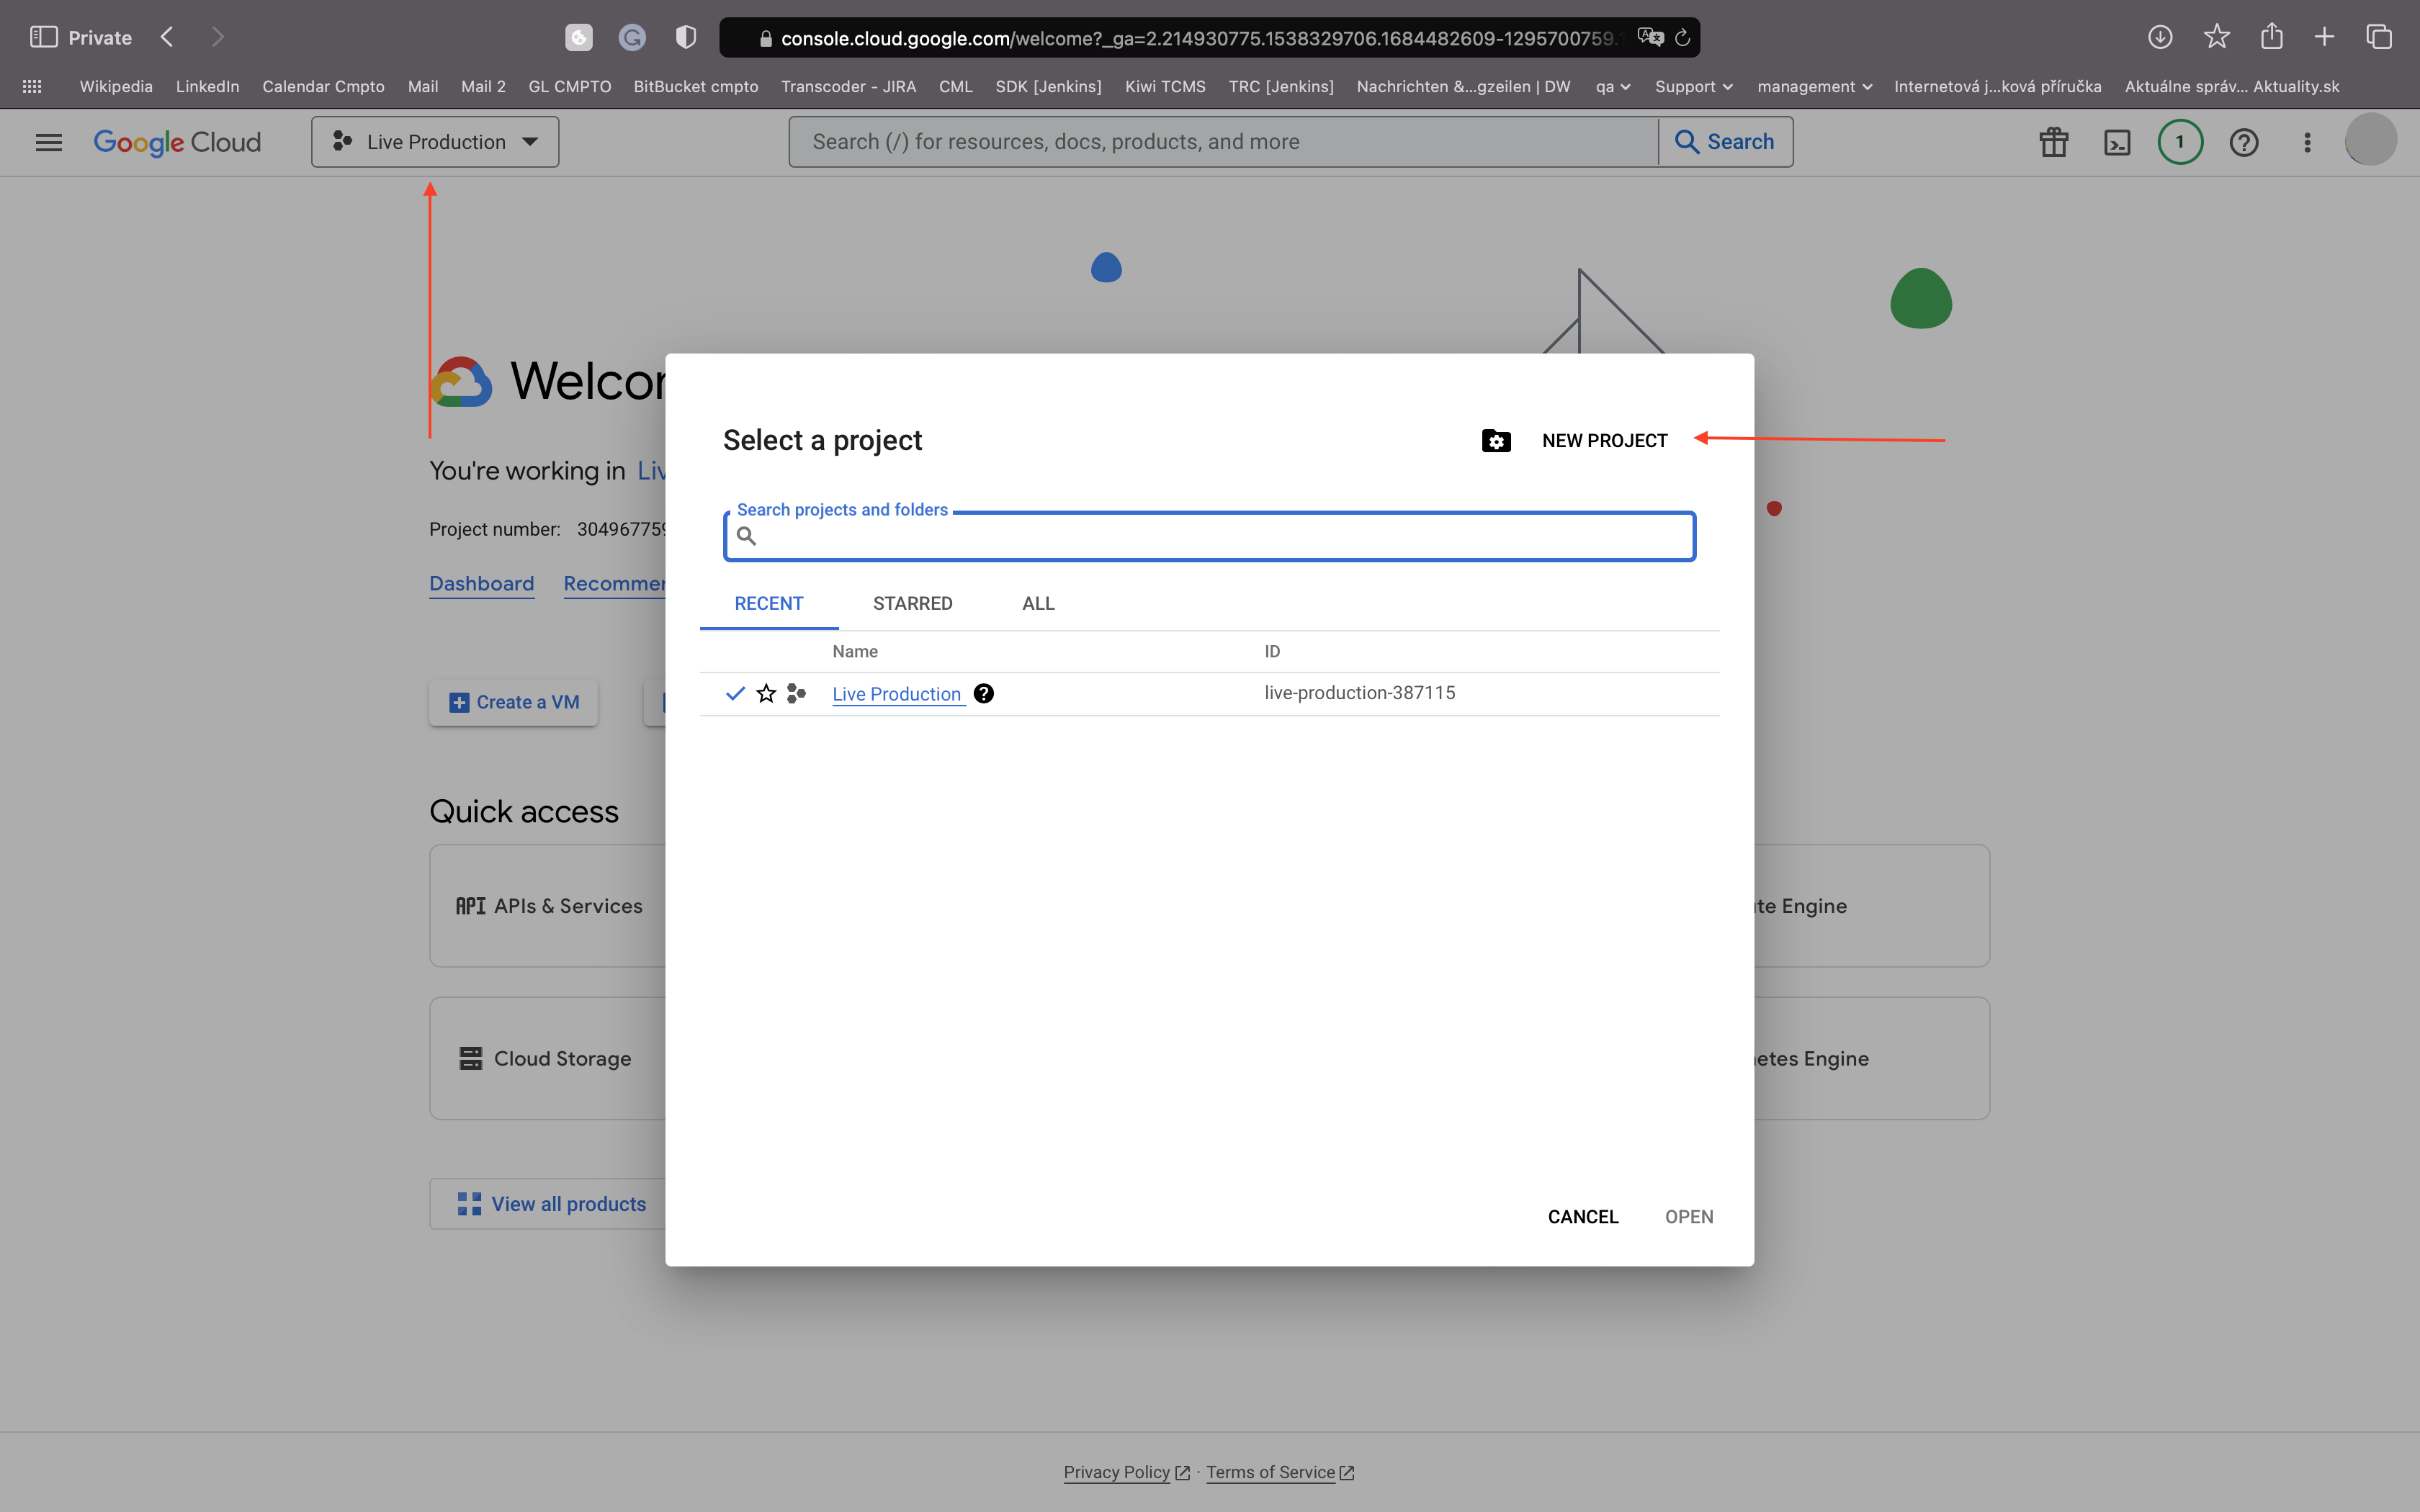
Creating a new Google Cloud project
- Visit cloud.google.com and sign in to your Google account
- Go to Console located in the top-right corner
- In the top-left corner is a drop-down menu to manage your projects. Click on it and create a new project
Enabling billing for a Google Cloud account
To enable billing in your project, please refer to the official Google Cloud docs.
Enabling the Compute Engine service
- On the dashboard, in the top-left corner, open-up menu
- Select APIs & Services and then Enabled APIs & services
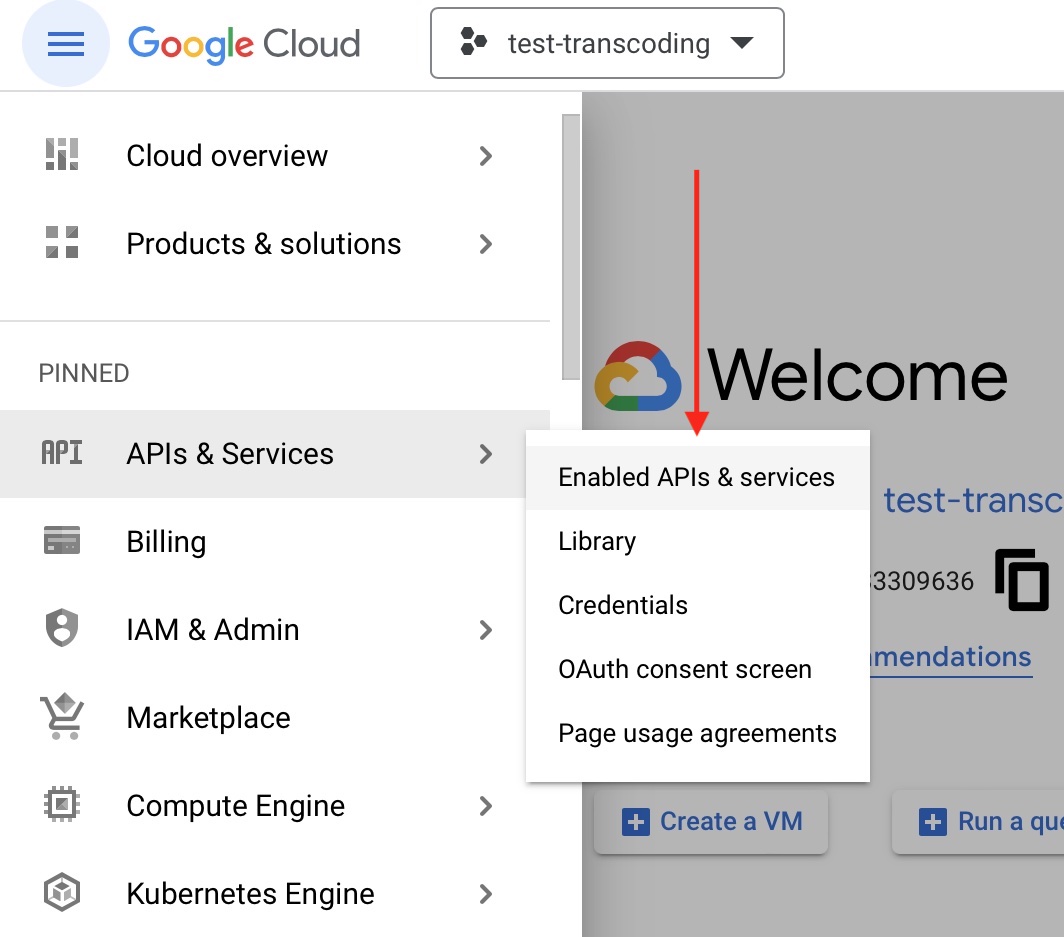
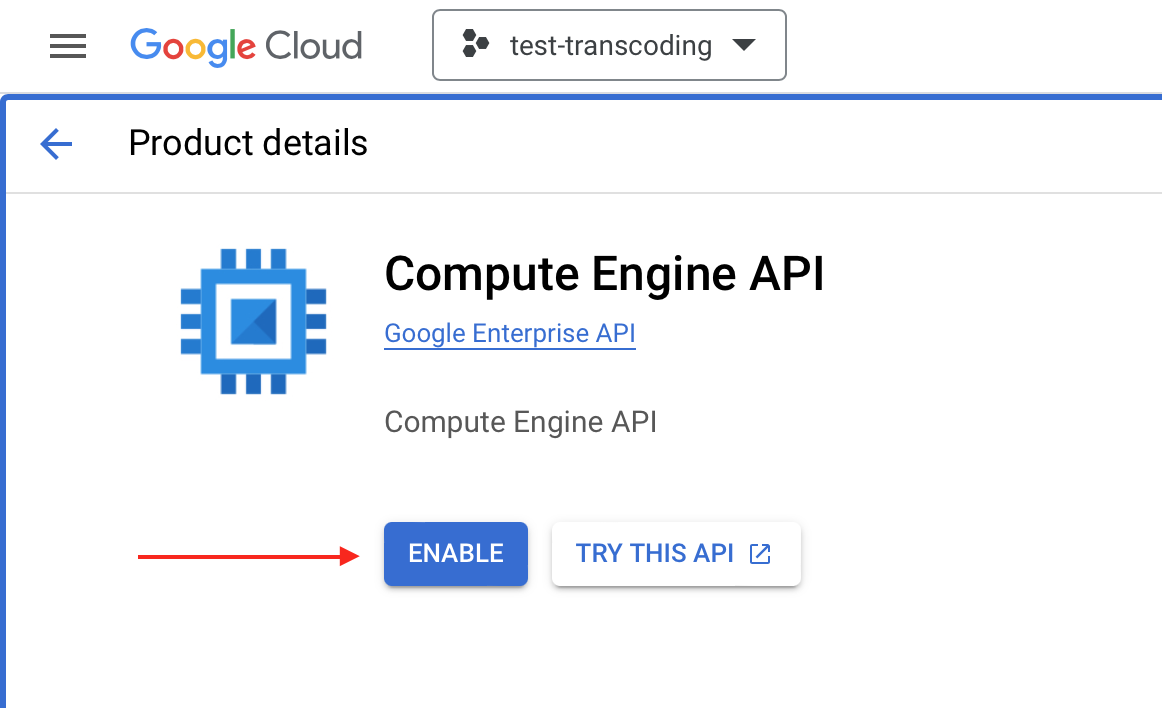
- Click on Enable APIs and services button

- And finally, find the Compute Engine service and enable it
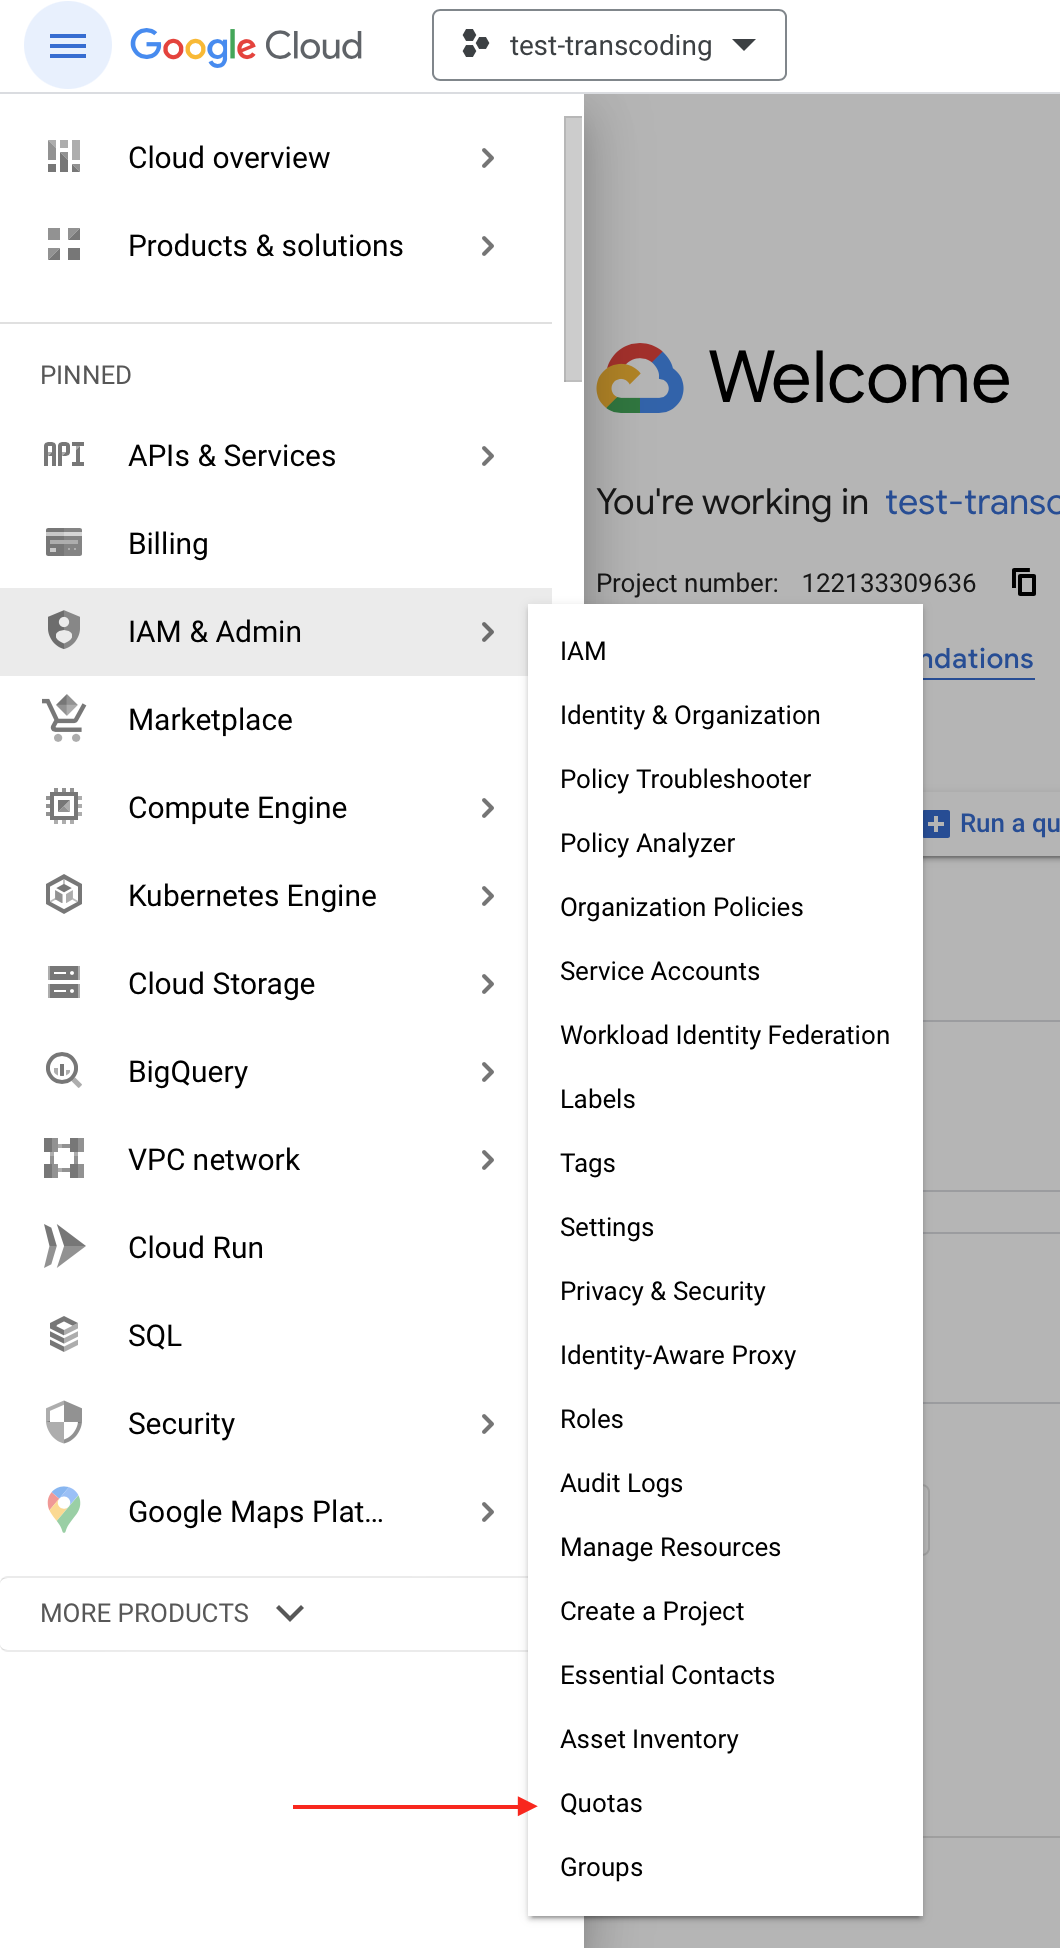
Checking and requesting quotas
- On the dashboard, in the top-left corner, open-up menu
- Select IAM & Admin and then click on Quotas
- On the Quotas page, filter out Service: Compute Engine, then find your quota for GPUs and CPUs
- You may also filter out the region you'd like to set up the quota for
- Once the filter is set, select filtered items by their checkboxes and click on Edit Quotas
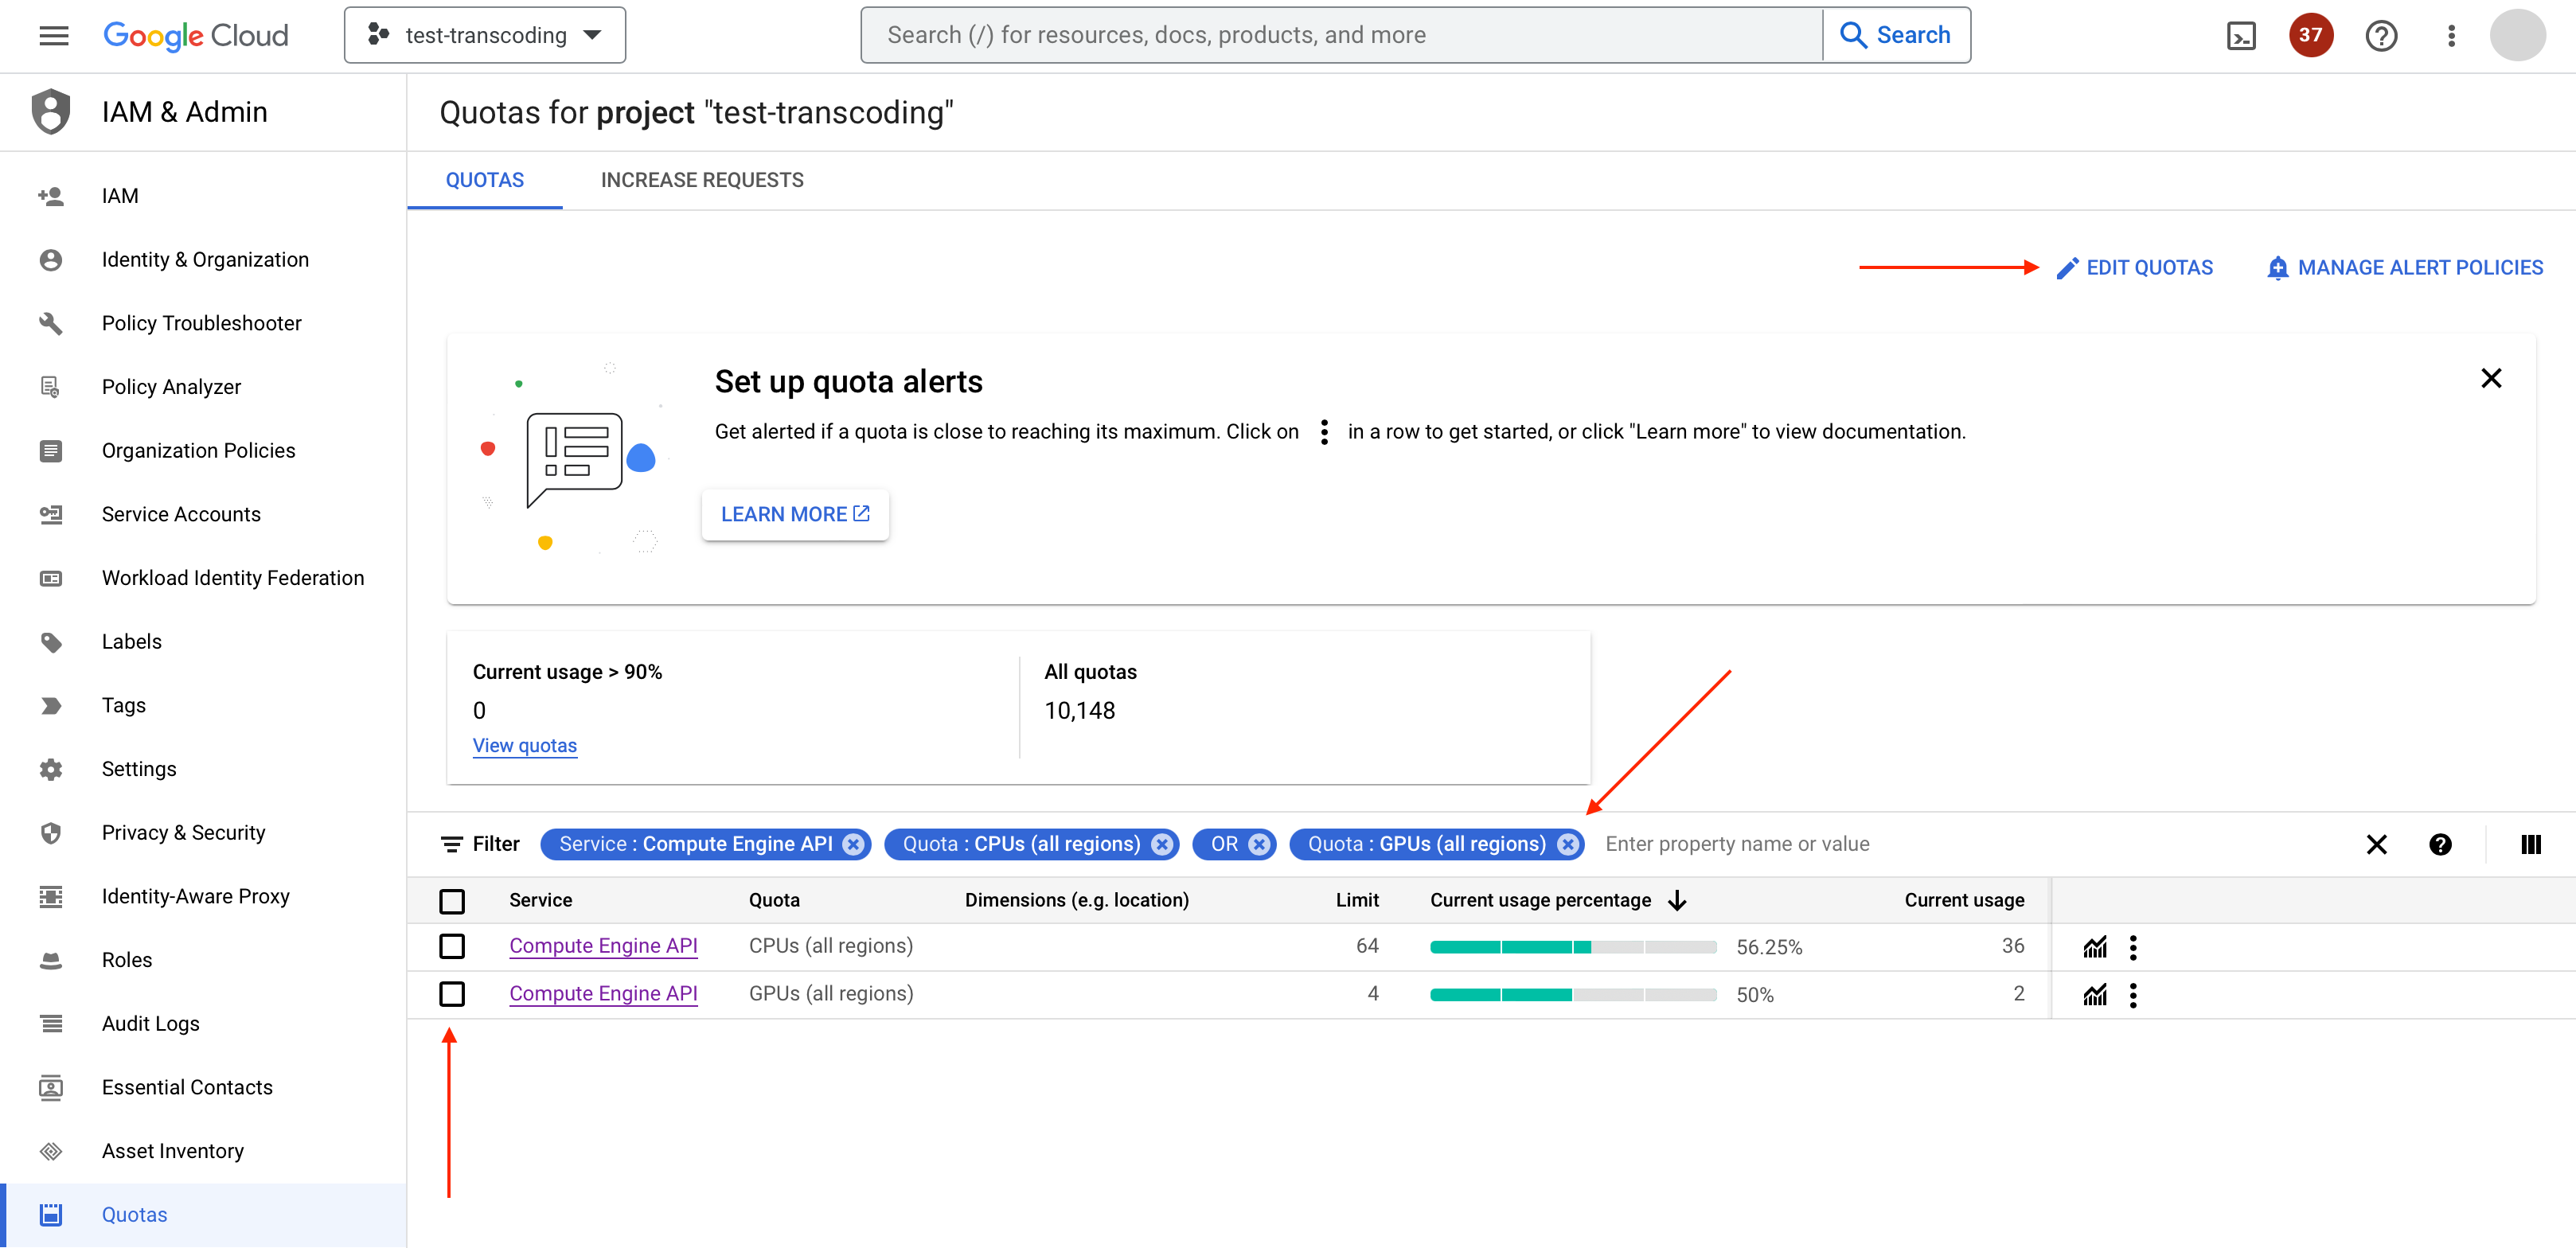
- In the popped-up dialog, specify the new limit for a particular quota and submit your request.
Quota limits recommendationMinimum:
- 4 vCPUs
- A single GPU
Note that you need at least 48 vCPUs to handle a single fully motion-compensated Framerate/Standards conversion stream at resolution 1920x1080 when converting from 50 FPS to 60 FPS or vice versa.
Updated about 1 year ago
What’s Next
Once your project is created, billing is set, Compute Engine service is enabled and the quotas for your working region are approved you are good to continue to Launch your host instance.
Did this page help you?